Documentation Index
Fetch the complete documentation index at: https://docs.monk.com/llms.txt
Use this file to discover all available pages before exploring further.
Billing for SaaS Products
This guide walks you through setting up billing for a SaaS product with Monk. We’ll cover the complete flow from customer creation to automatic payment collection.What We’ll Build
By the end of this guide, you’ll have:- Customers linked to Stripe for payment collection
- Meters to track usage (API calls, tokens, etc.)
- Plans that bundle pricing into reusable templates
- Contracts that subscribe customers to plans
- Auto-pay for automatic payment collection
- Usage tracking via API integration
This guide assumes you have a Monk account and have connected your Stripe
account. If you haven’t done this yet, visit the
Dashboard to get started.
Example Scenario
Let’s say you’re building an AI agent SaaS with the following pricing model:| Plan | Monthly Fee | Usage Rate |
|---|---|---|
| Free | $0 | $0.10 per API call |
| Pro | $50 | $0.08 per API call |
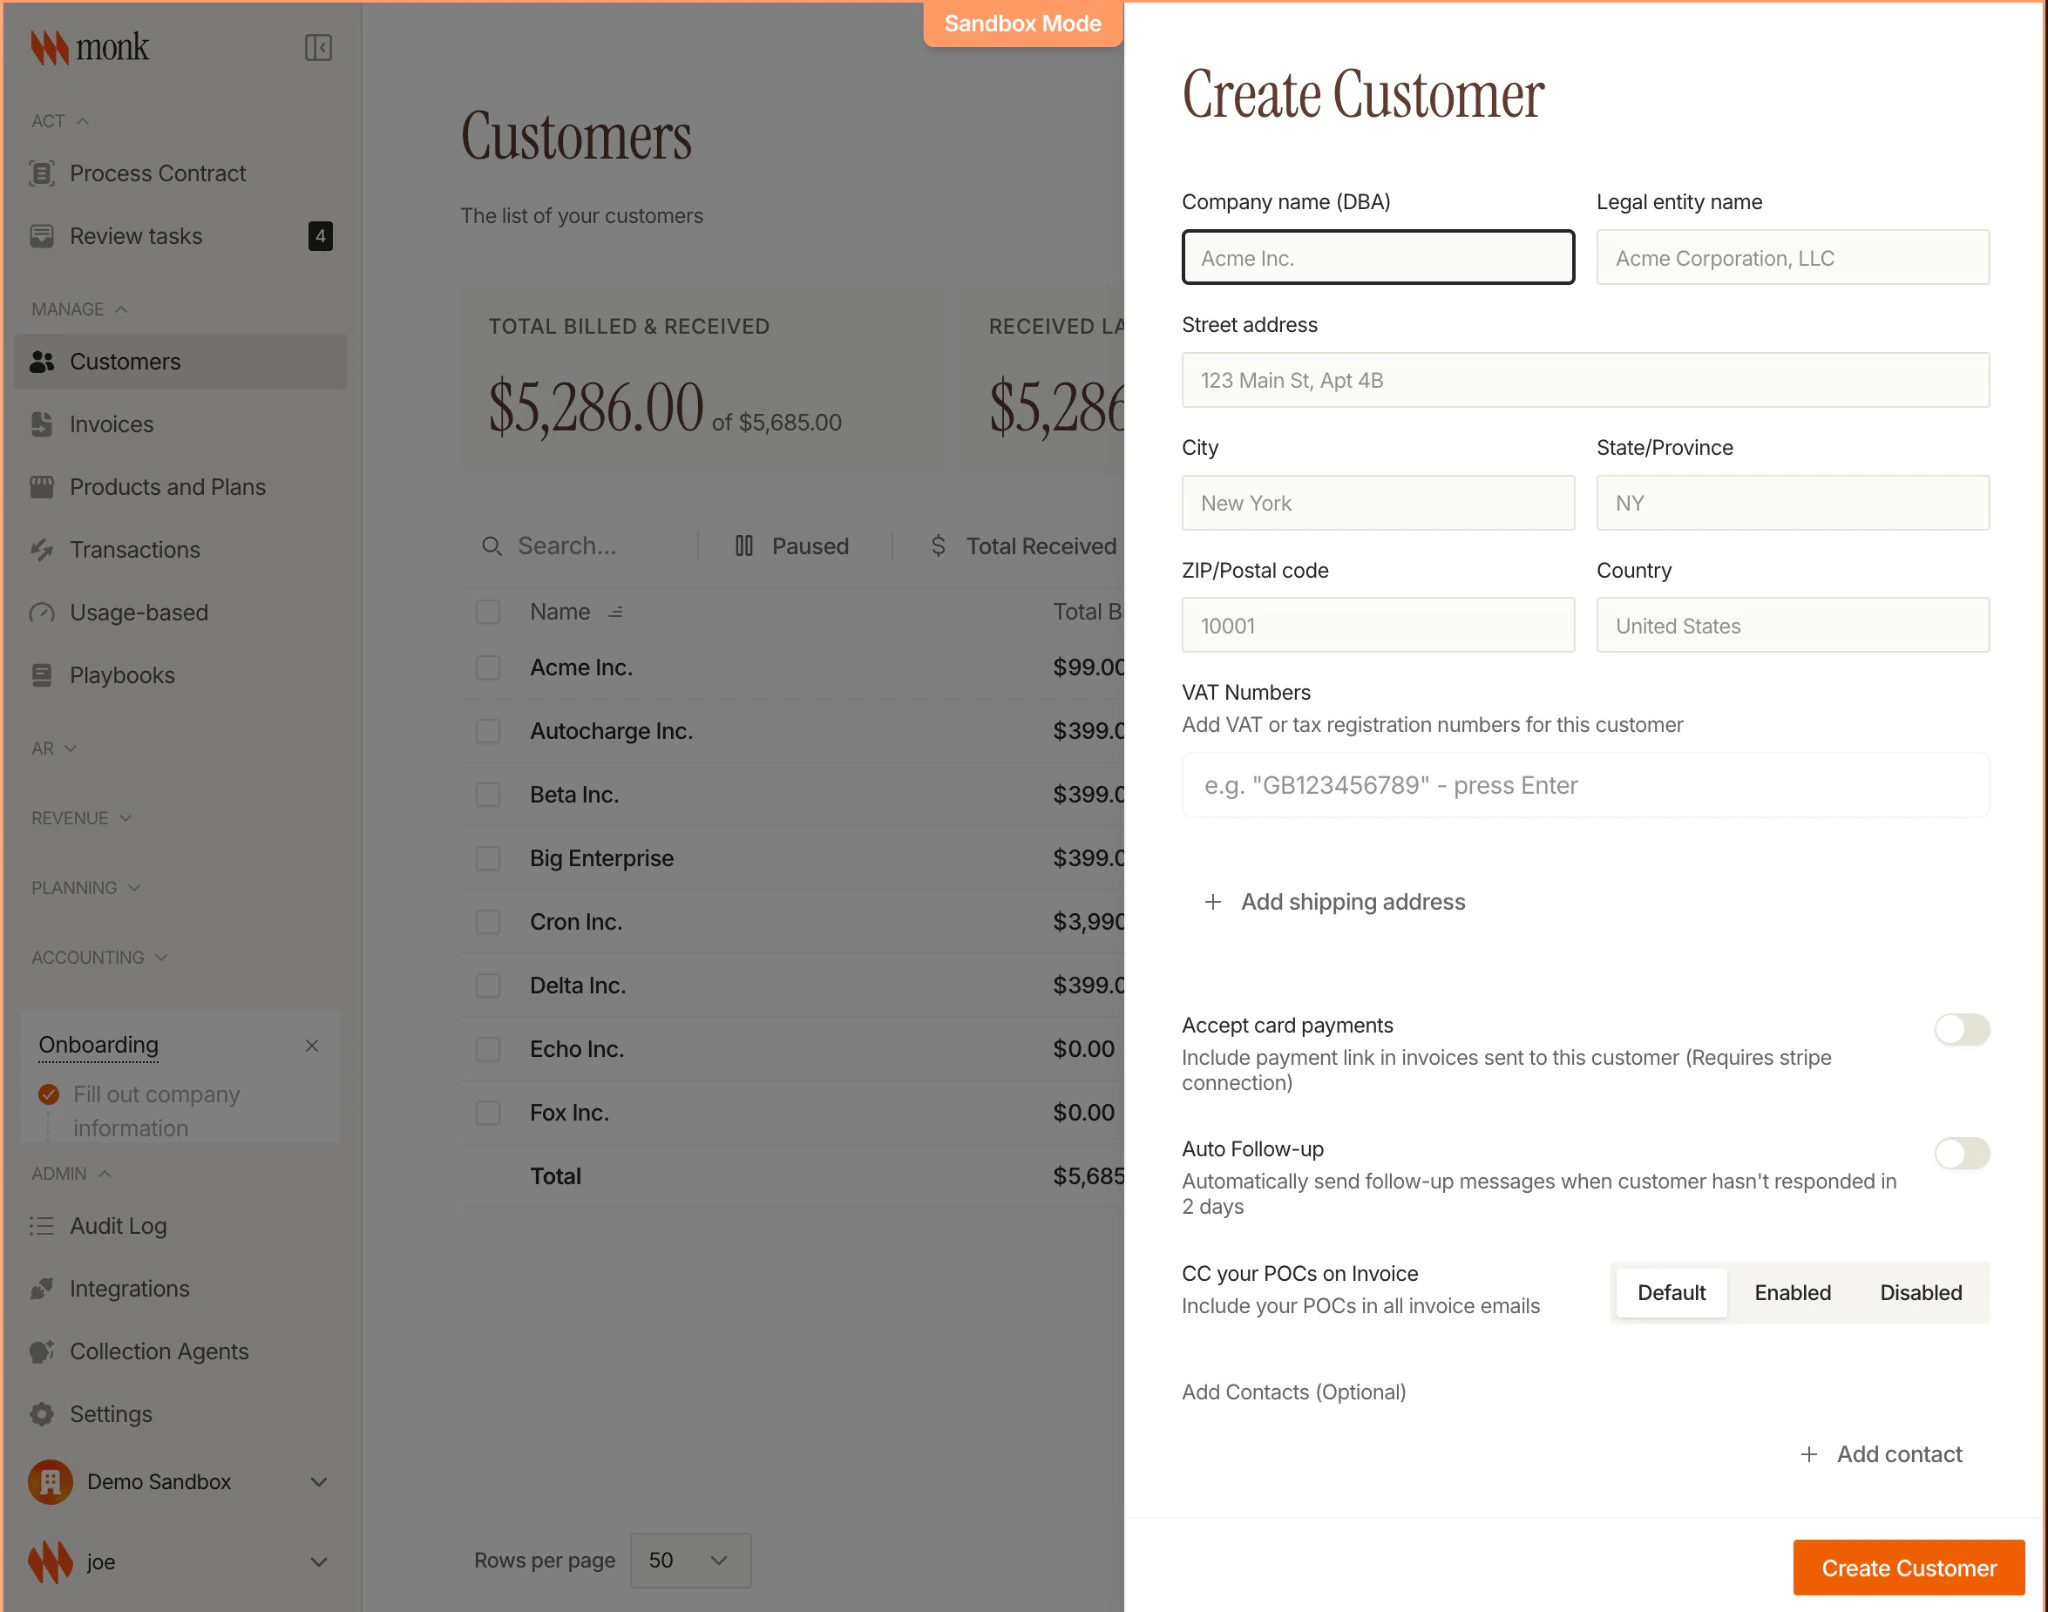
Step 1: Create Your Customer
First, create a customer in Monk. If you already have a Stripe customer, you can link them directly to avoid waiting for webhook synchronization.Via API
paymentProviderId and provider parameters are optional but recommended. They:
- Link the Monk customer to an existing Stripe customer
- Enable auto-pay using the customer’s saved payment methods
- Prevent duplicate customer creation when Stripe webhooks arrive
Via Dashboard
- Navigate to Customers in your Monk dashboard
- Click Add Customer
- Enter the customer details
- Optionally link to an existing Stripe customer
Learn More
See the full tutorial on creating customers and contracts
Step 2: Set Up a Meter
Meters define what you’re measuring. For our AI agent, we’ll track API calls.Via Dashboard
- Navigate to Products → Meters
- Click Create Meter
- Configure:
- Code:
API_CALL(the meter identifier) - Event Name:
call_count(the event name to listen for) - Display Name: “API Calls”
- Aggregation: Count (number of API calls)
- Code:
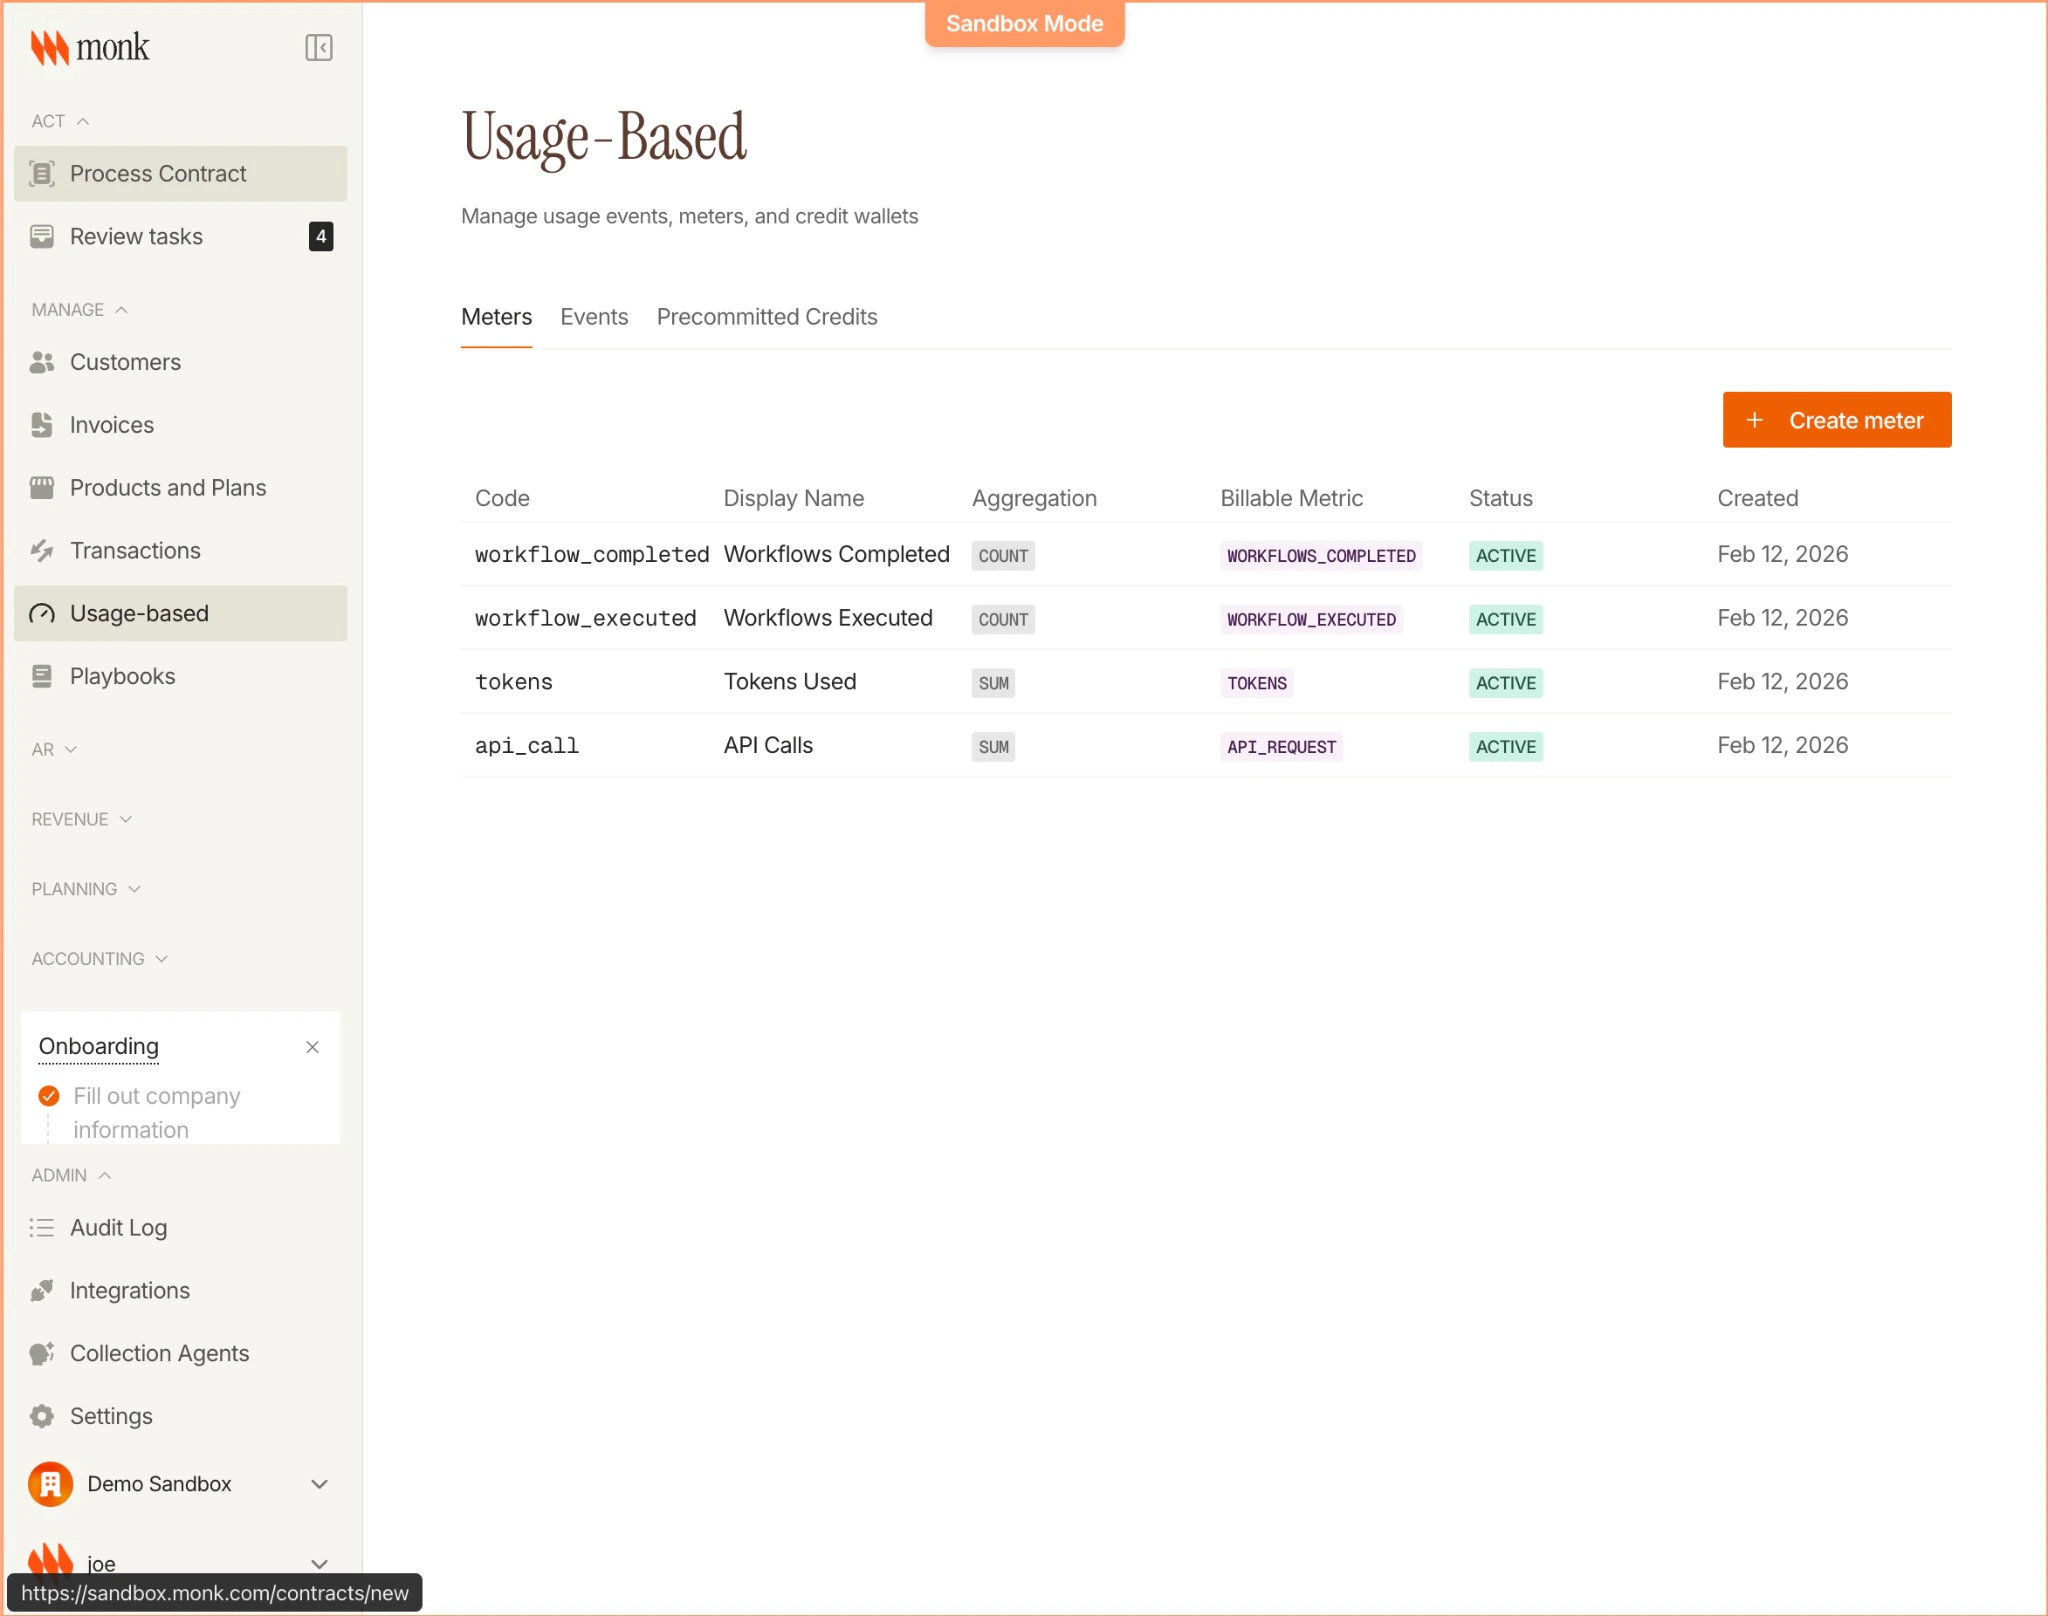
Key Concepts
| Property | Description | Example |
|---|---|---|
| Code | Unique meter identifier | API_CALL, STORAGE_GB |
| Event Name | The event name the meter listens for | call_count, storage_used |
| Aggregation | How usage is combined | Count, Sum, Max, Unique Count |
Learn More
See the full tutorial on creating meters
Step 3: Create Your Plans
Plans are reusable pricing templates. Create one for each tier.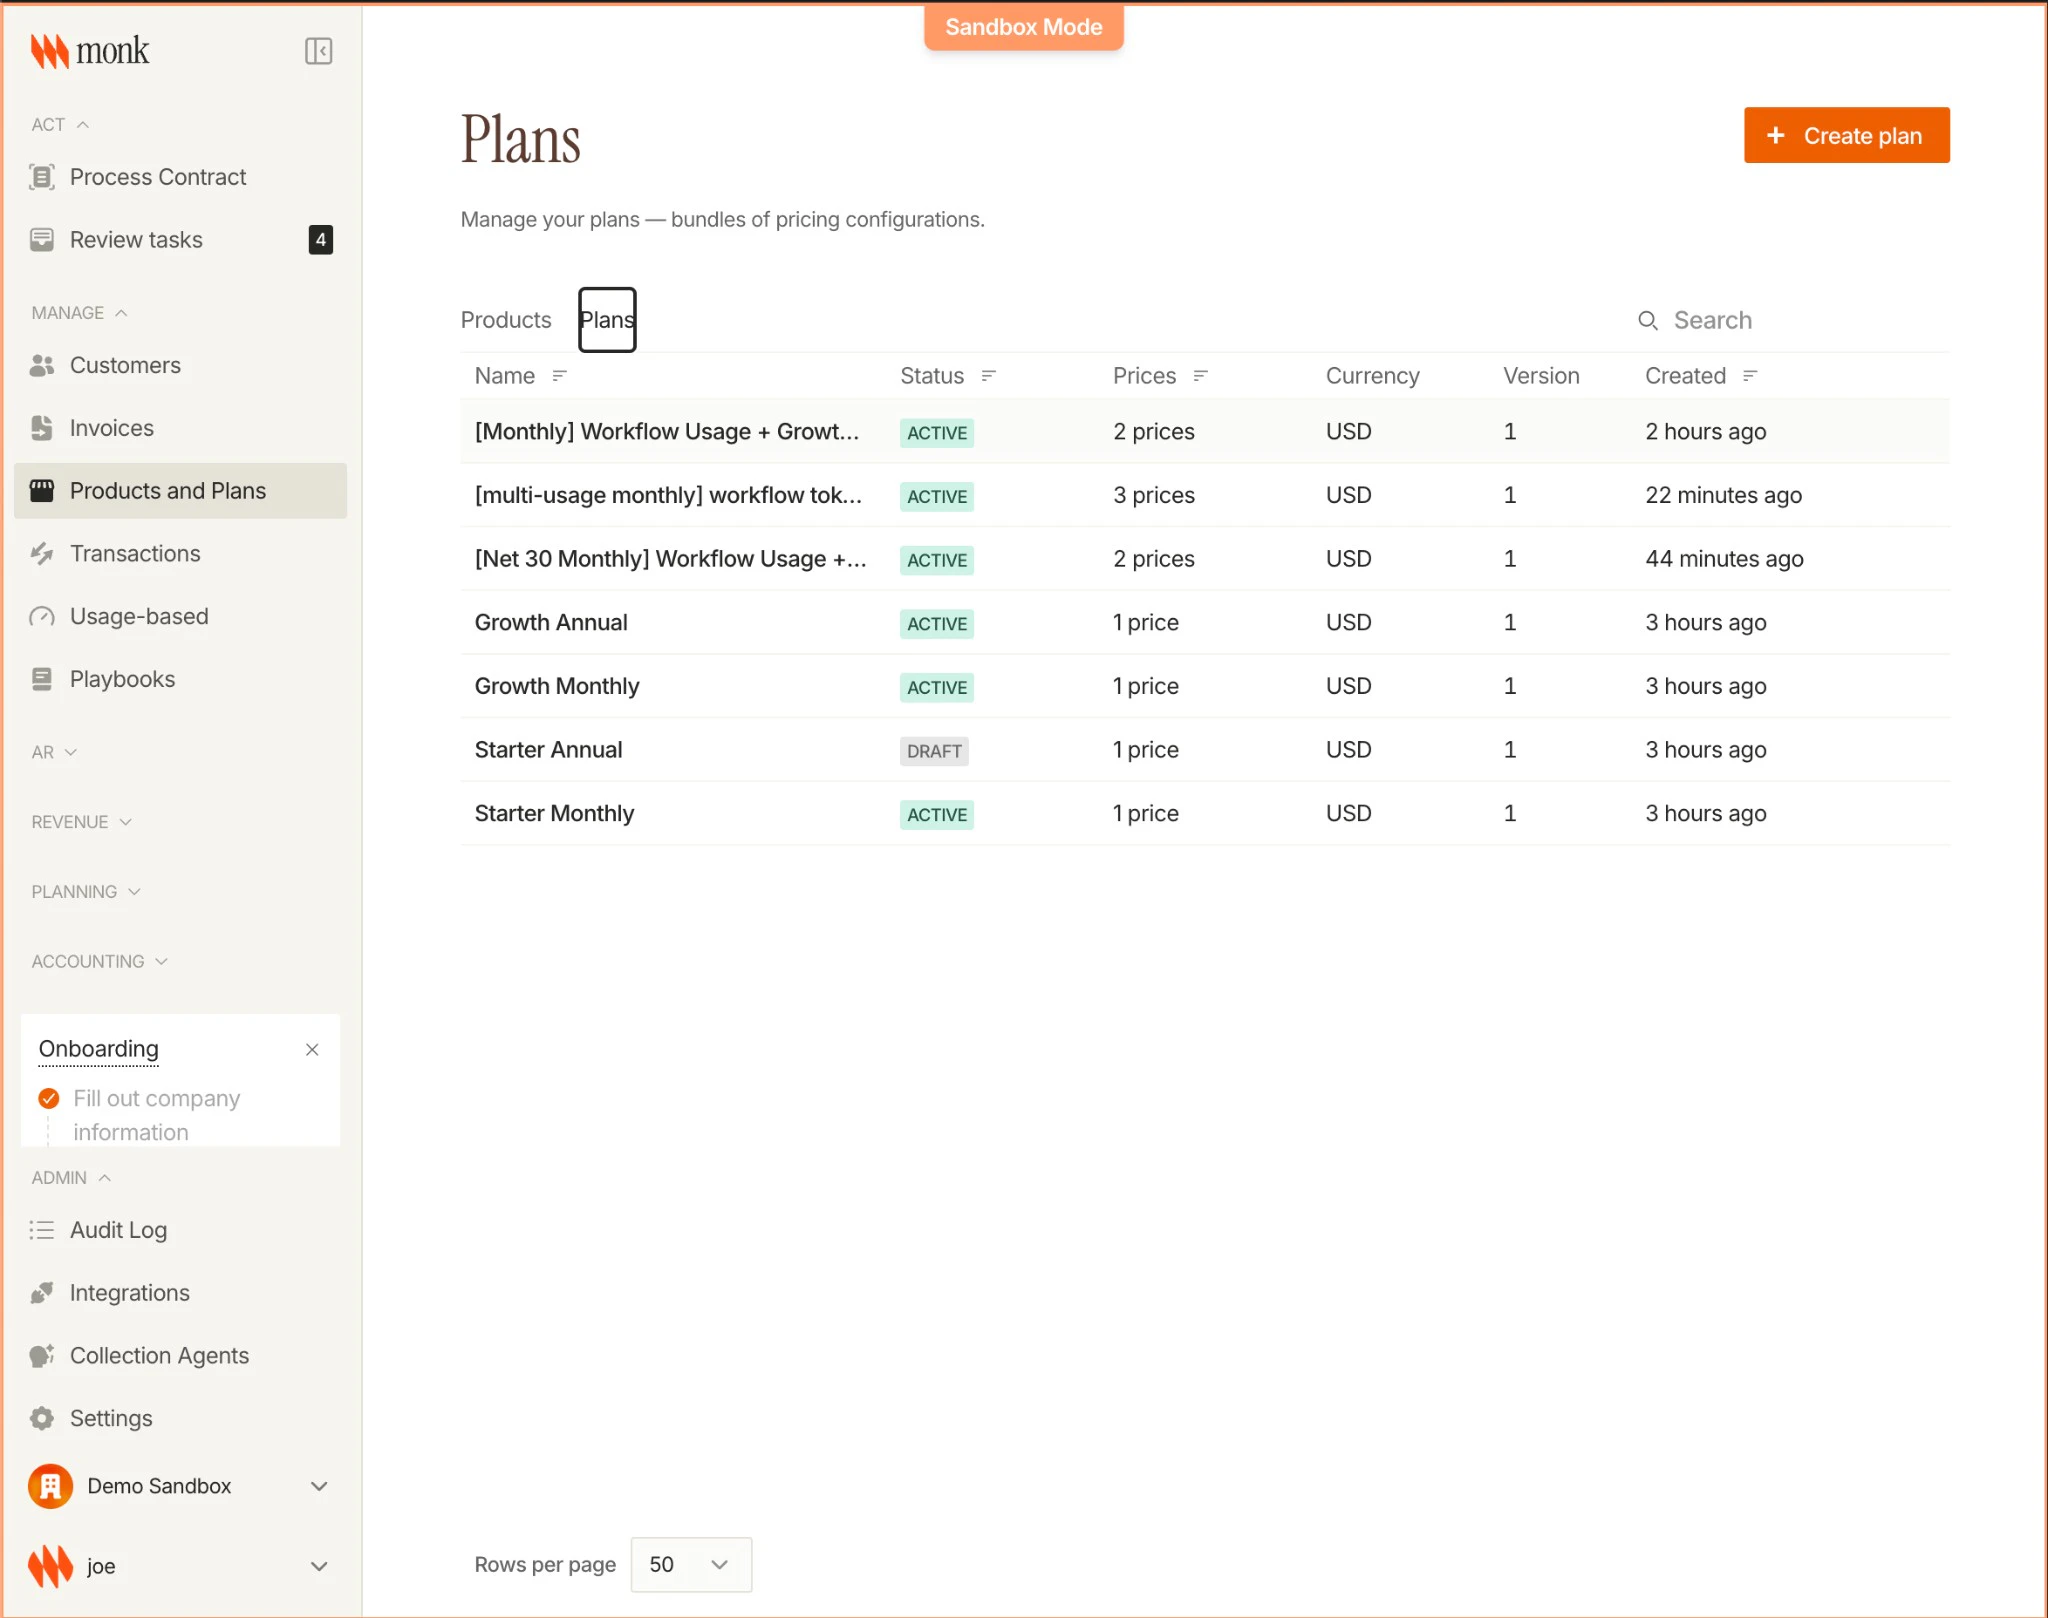
Free Plan
- Navigate to Products → Plans
- Click Create Plan
-
Configure:
- Name: “Free”
- Net Terms: Net 30 (or your preference)
- Currency: USD
-
Add pricing items:
- Usage-based price linked to
API_CALLmeter - $0.10 per API call
- Usage-based price linked to
Pro Plan
- Create another plan named “Pro”
-
Configure:
- Net Terms: Due on receipt (Net 0) — required for auto-pay
- Auto-pay default: Enabled
-
Add pricing items:
- Fixed monthly fee: $50
- Usage-based price: $0.08 per API call
Learn More
See the full tutorial on creating plans
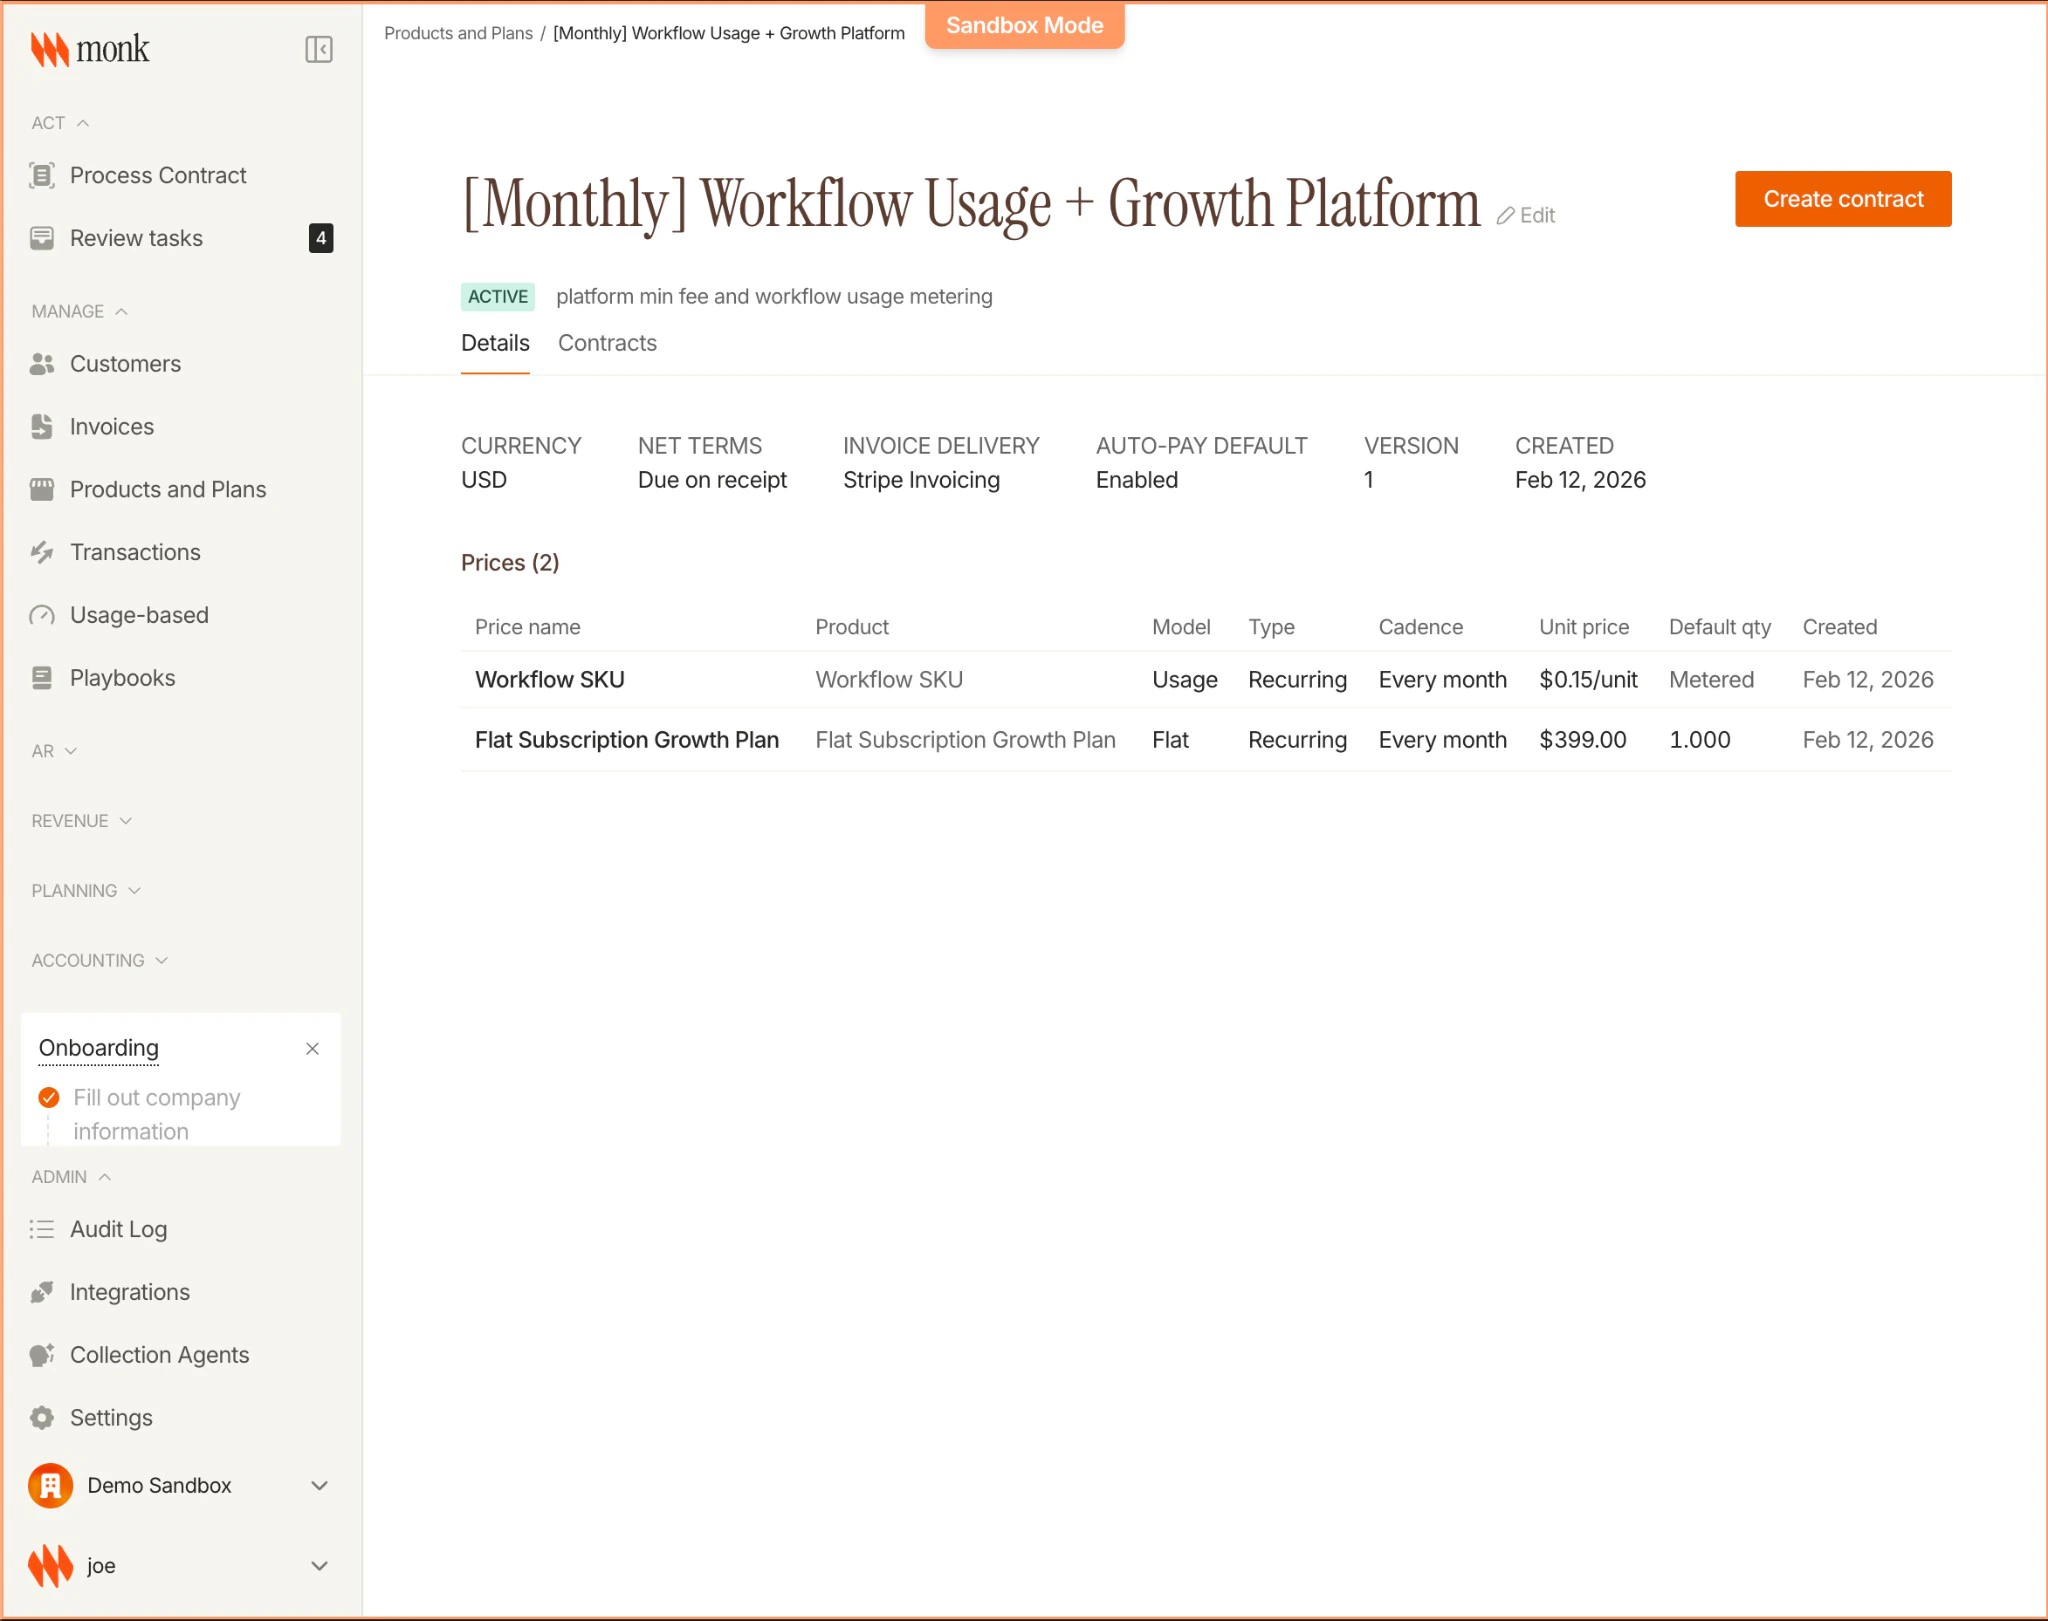
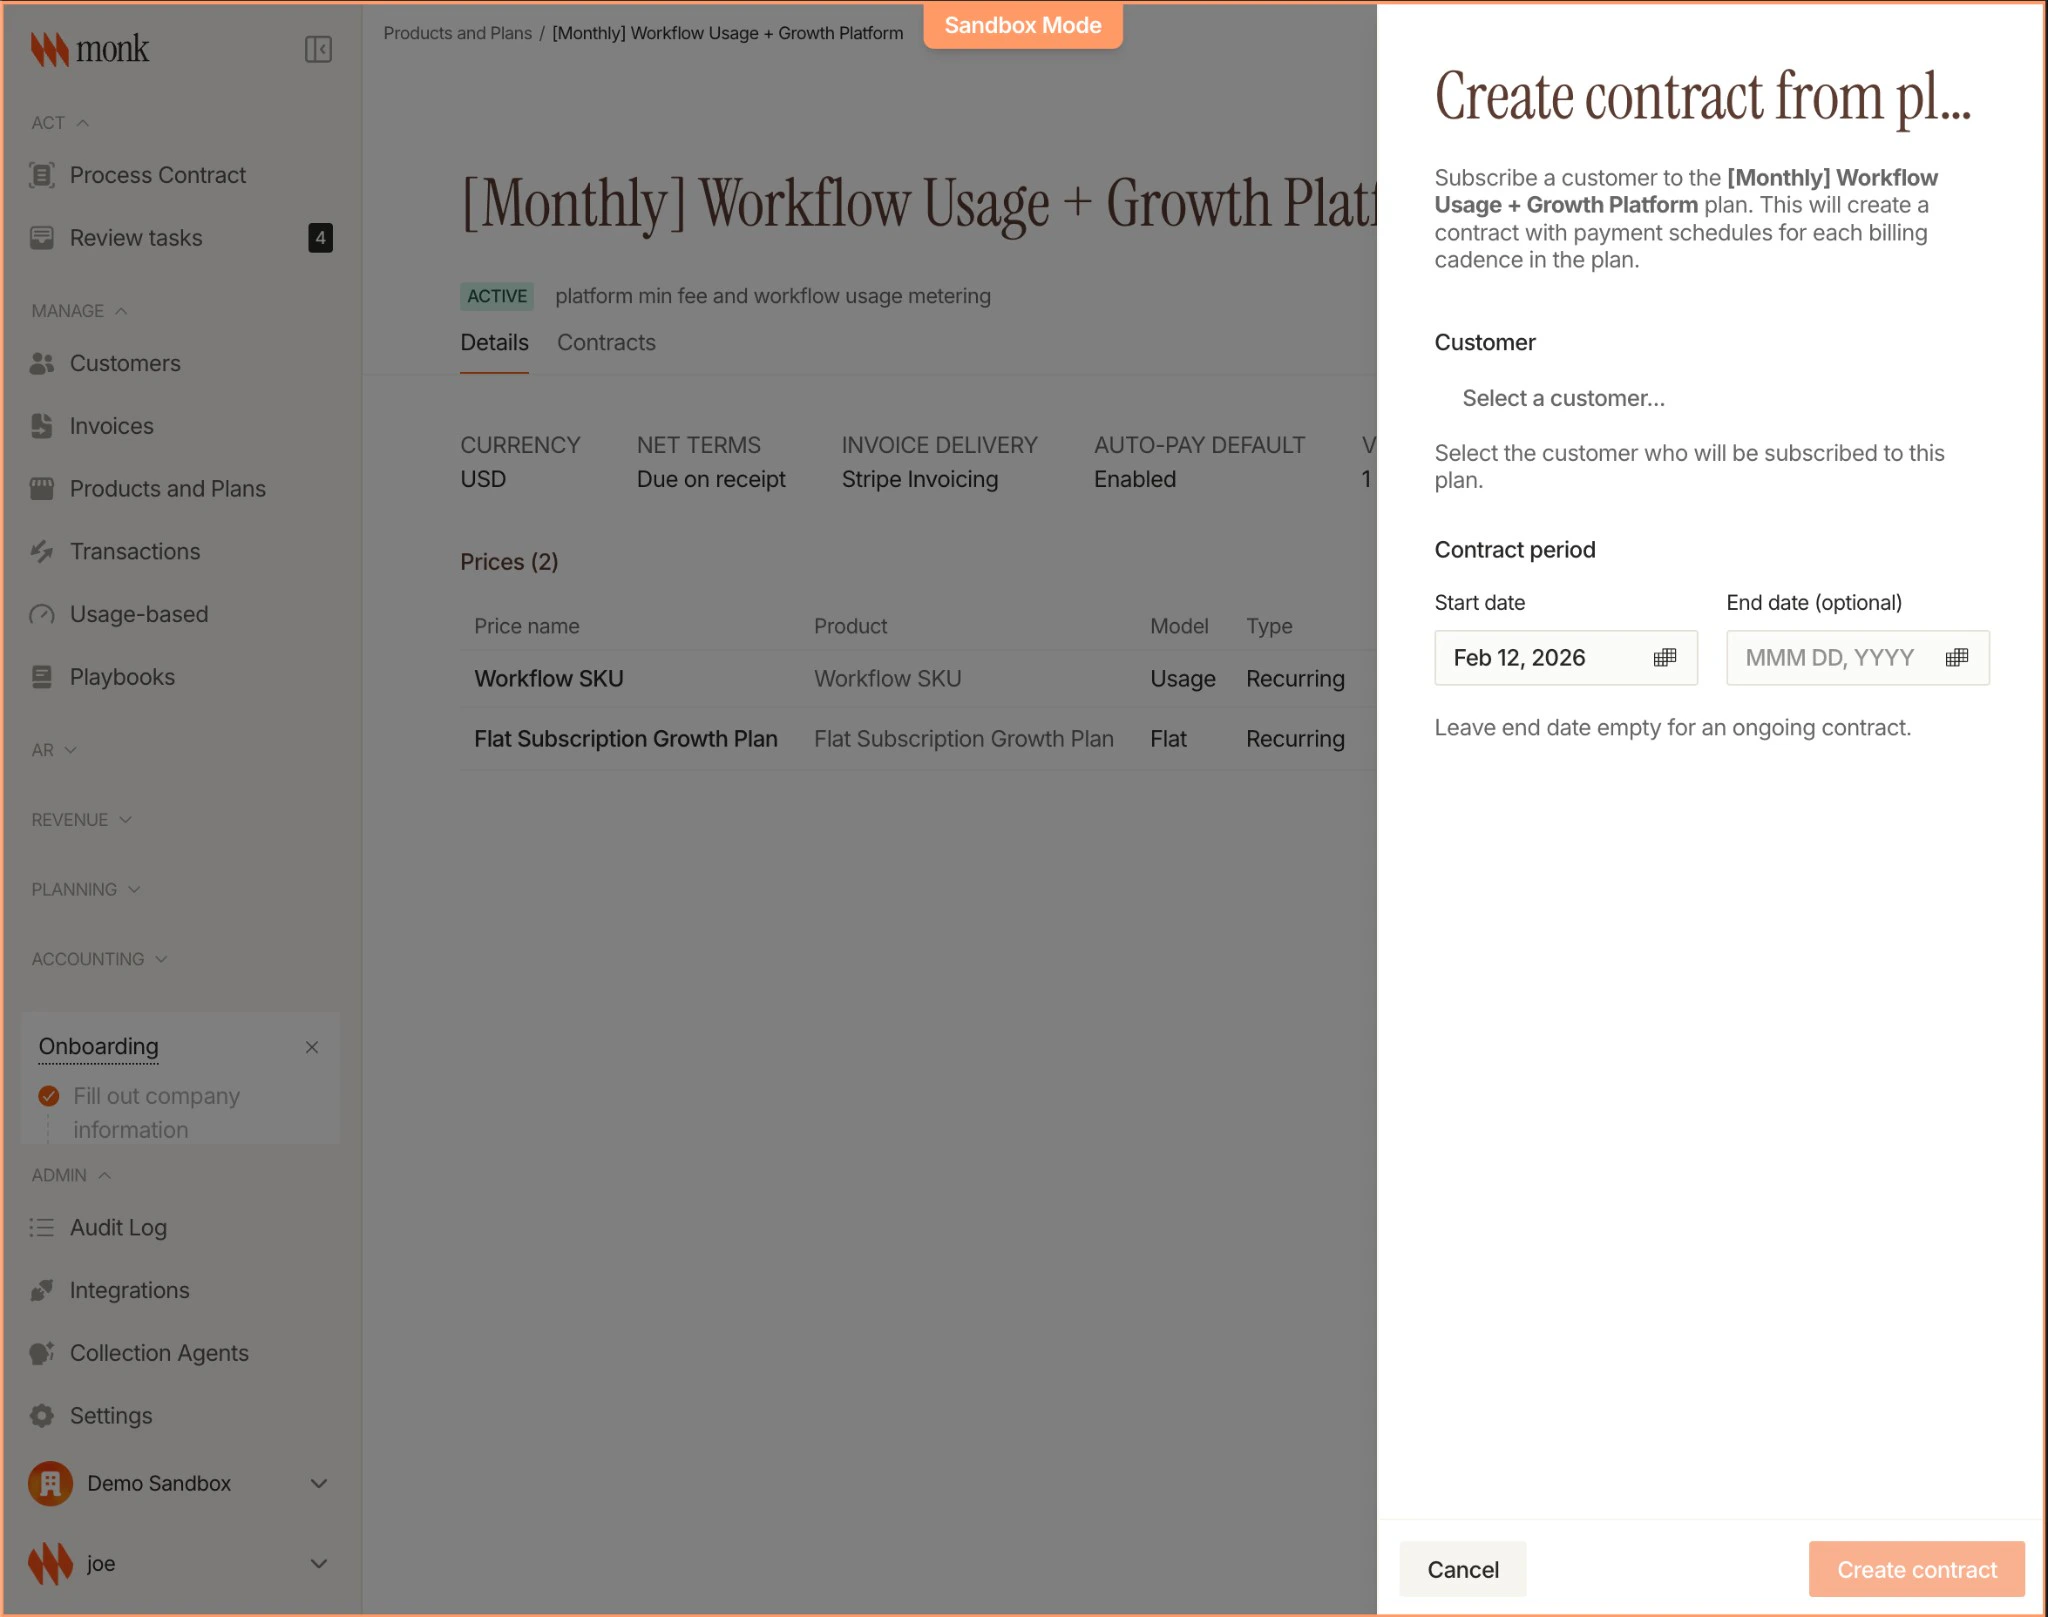
Step 4: Subscribe a Customer
Create a contract to subscribe a customer to a plan.Via API
What Happens
When you create a contract:- Invoices are pre-generated for each billing period
- Line items are created based on the plan’s pricing
- Auto-pay is enabled if the plan has it configured
- Usage events will automatically update the correct invoice
Via Dashboard
- Navigate to Products → Plans
- Click on the plan (e.g., “Pro”)
- Click Create Contract
- Select the customer and start date
Learn More
See the full tutorial on creating contracts
Step 5: Collect Payment Information
For auto-pay to work, customers need a saved payment method in Stripe.Payment Portal
When customers pay their first invoice, they can opt into auto-pay through Monk’s payment portal:- Customer receives invoice email with payment link
- Customer pays via Stripe Checkout
- Customer checks “Save payment method for future invoices”
- Payment method is saved and linked to the contract
Stripe SetupIntent (Custom Integration)
Collect payment information via Stripe Elements following this guide. Although Stripe’s hosted checkout flow is also an option, we recommend Stripe Elements for their ability to customize and embed the form directly into your experience:- The payment information you’re collecting should be usable for future, recurring charges without the customer present
- Use
SetupIntent(notPaymentIntent) since you’re saving the payment method, not charging immediately
- Save and reuse payment methods (Stripe docs)
- Accept a payment (Stripe docs)
Learn More
See the full tutorial on setting up auto-pay
Step 6: Send Usage Events
As customers use your product, send usage events to Monk.Via API
Key Fields
| Field | Required | Description |
|---|---|---|
customer_id | Yes | The Monk customer UUID |
event_name | Yes | The event name matching a meter (e.g., call_count) |
idempotency_key | No | Unique key to prevent duplicates (auto-generated if omitted) |
timestamp | No | When the event occurred (defaults to now) |
properties | No | Additional metadata as key-value pairs |
How Matching Works
- You send an event with
event_name: "call_count" - Monk finds meters configured with
eventName: "call_count"(e.g., theAPI_CALLmeter) - Monk finds the customer’s active contract
- Monk finds the draft invoice for the current billing period
- Monk matches the line item via meter → pricing relationship
- Usage is aggregated and the invoice total is updated
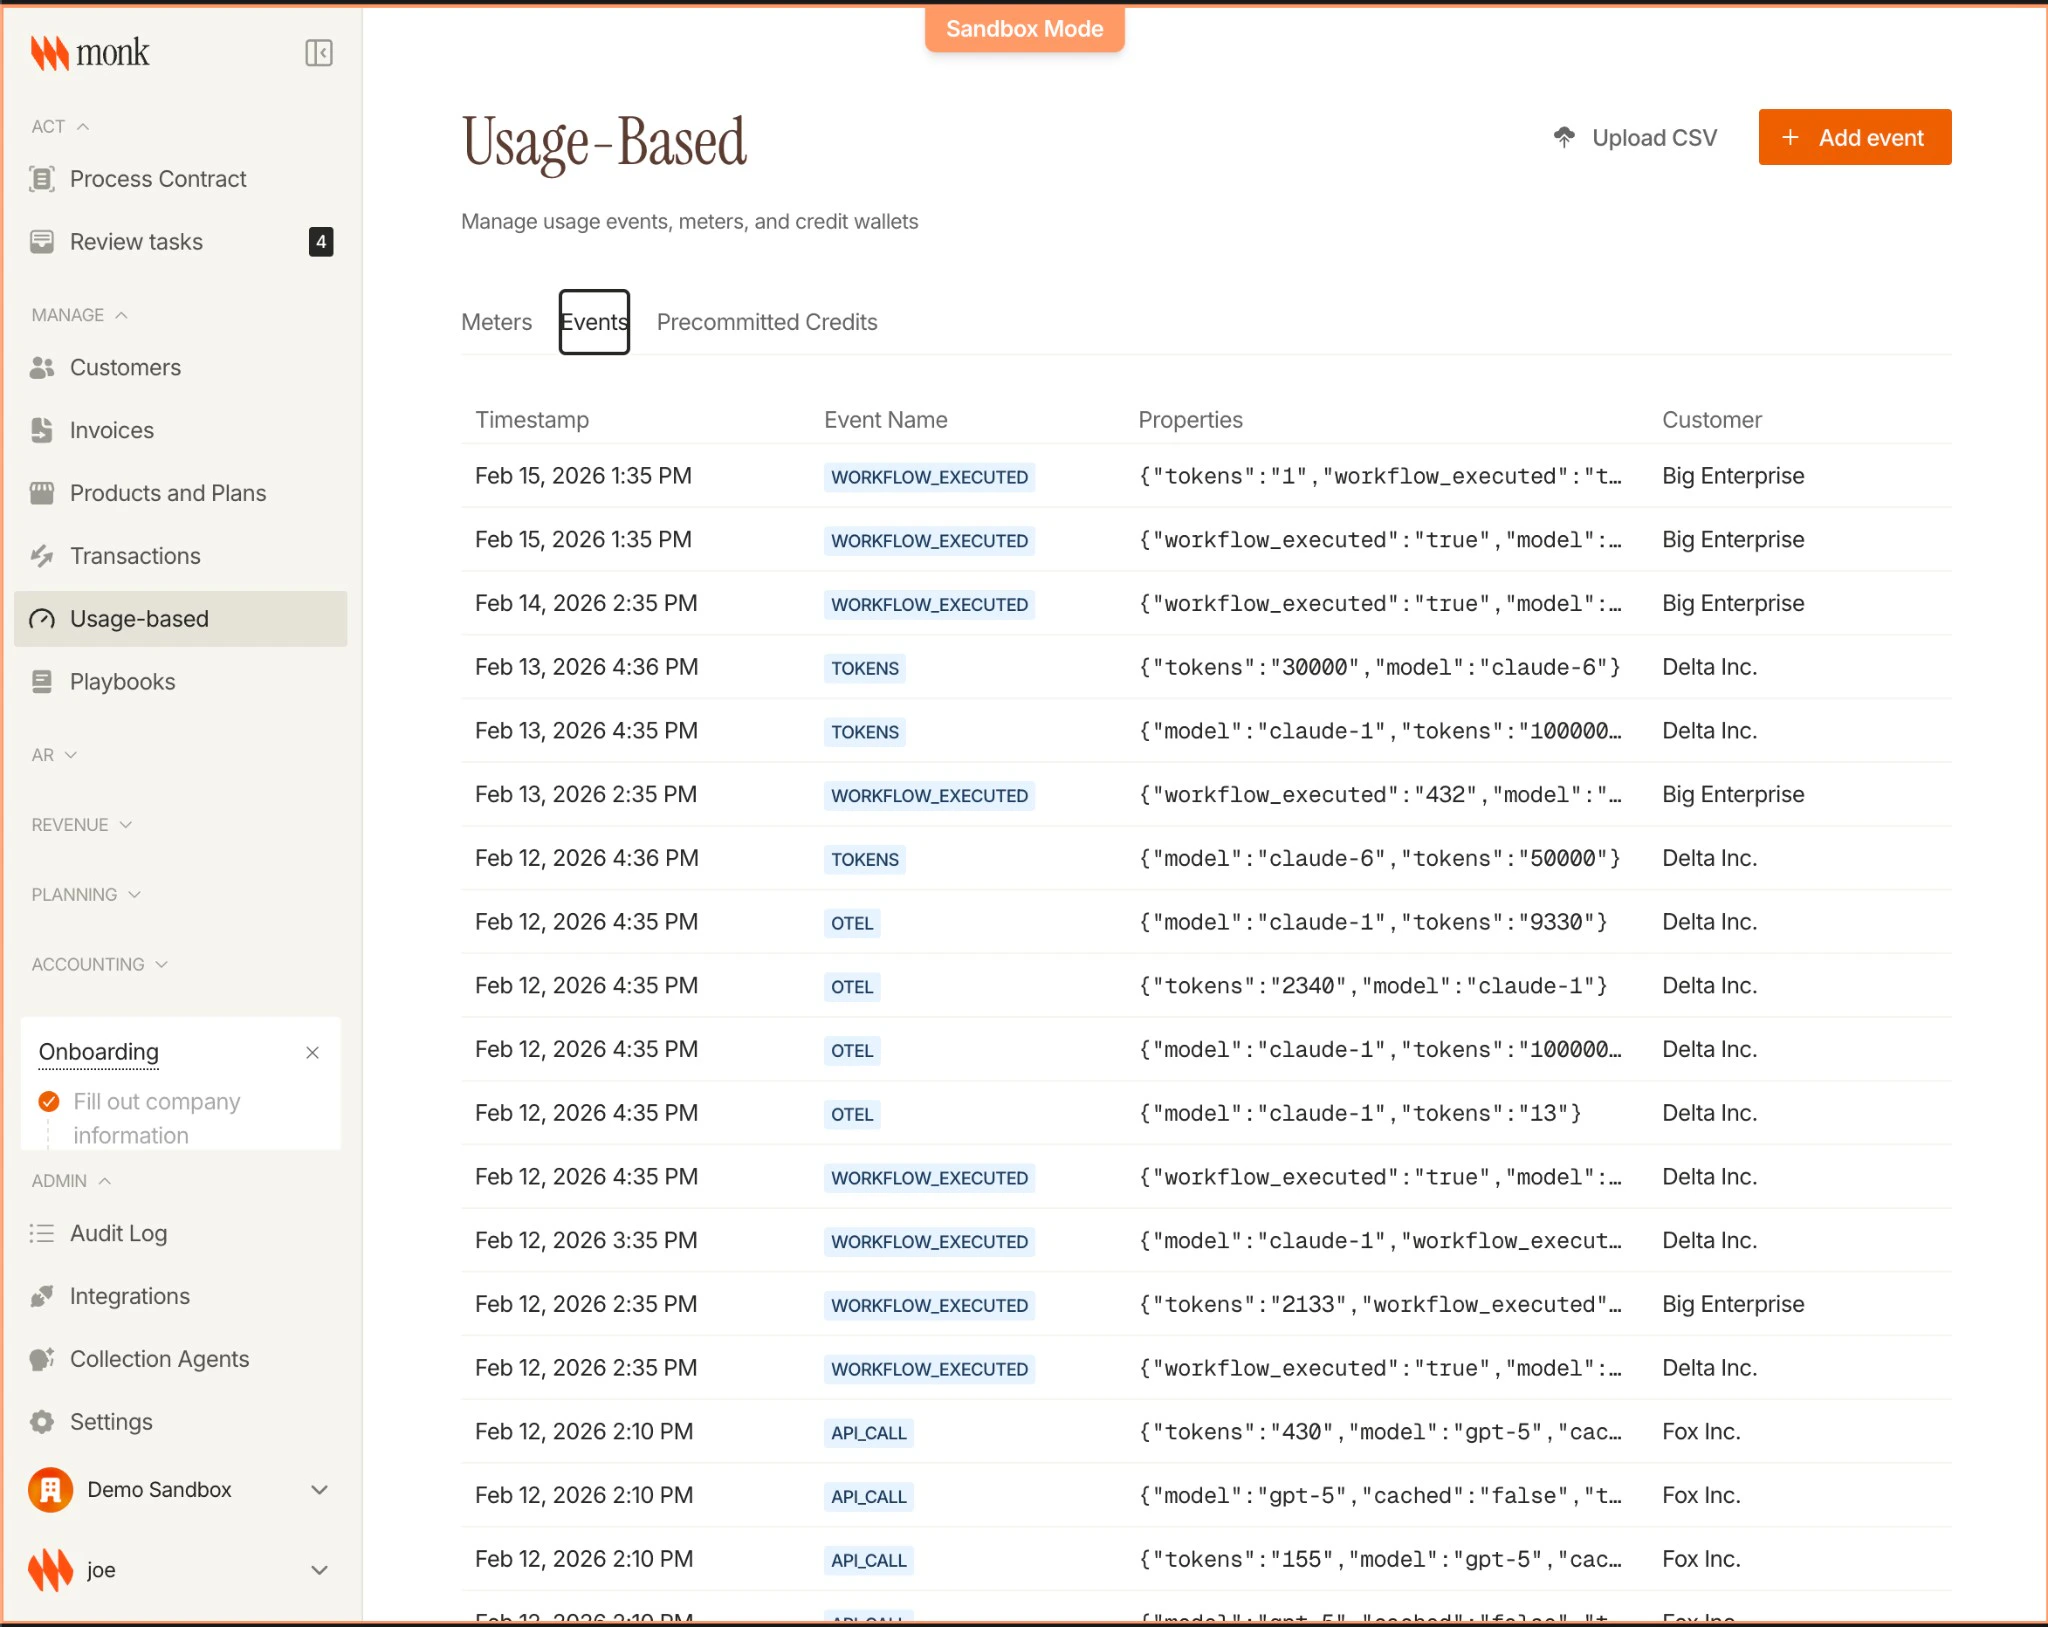
Usage matching is asynchronous. Events are processed in the background,
typically within a minute.
API Reference
See the full API specification for usage events
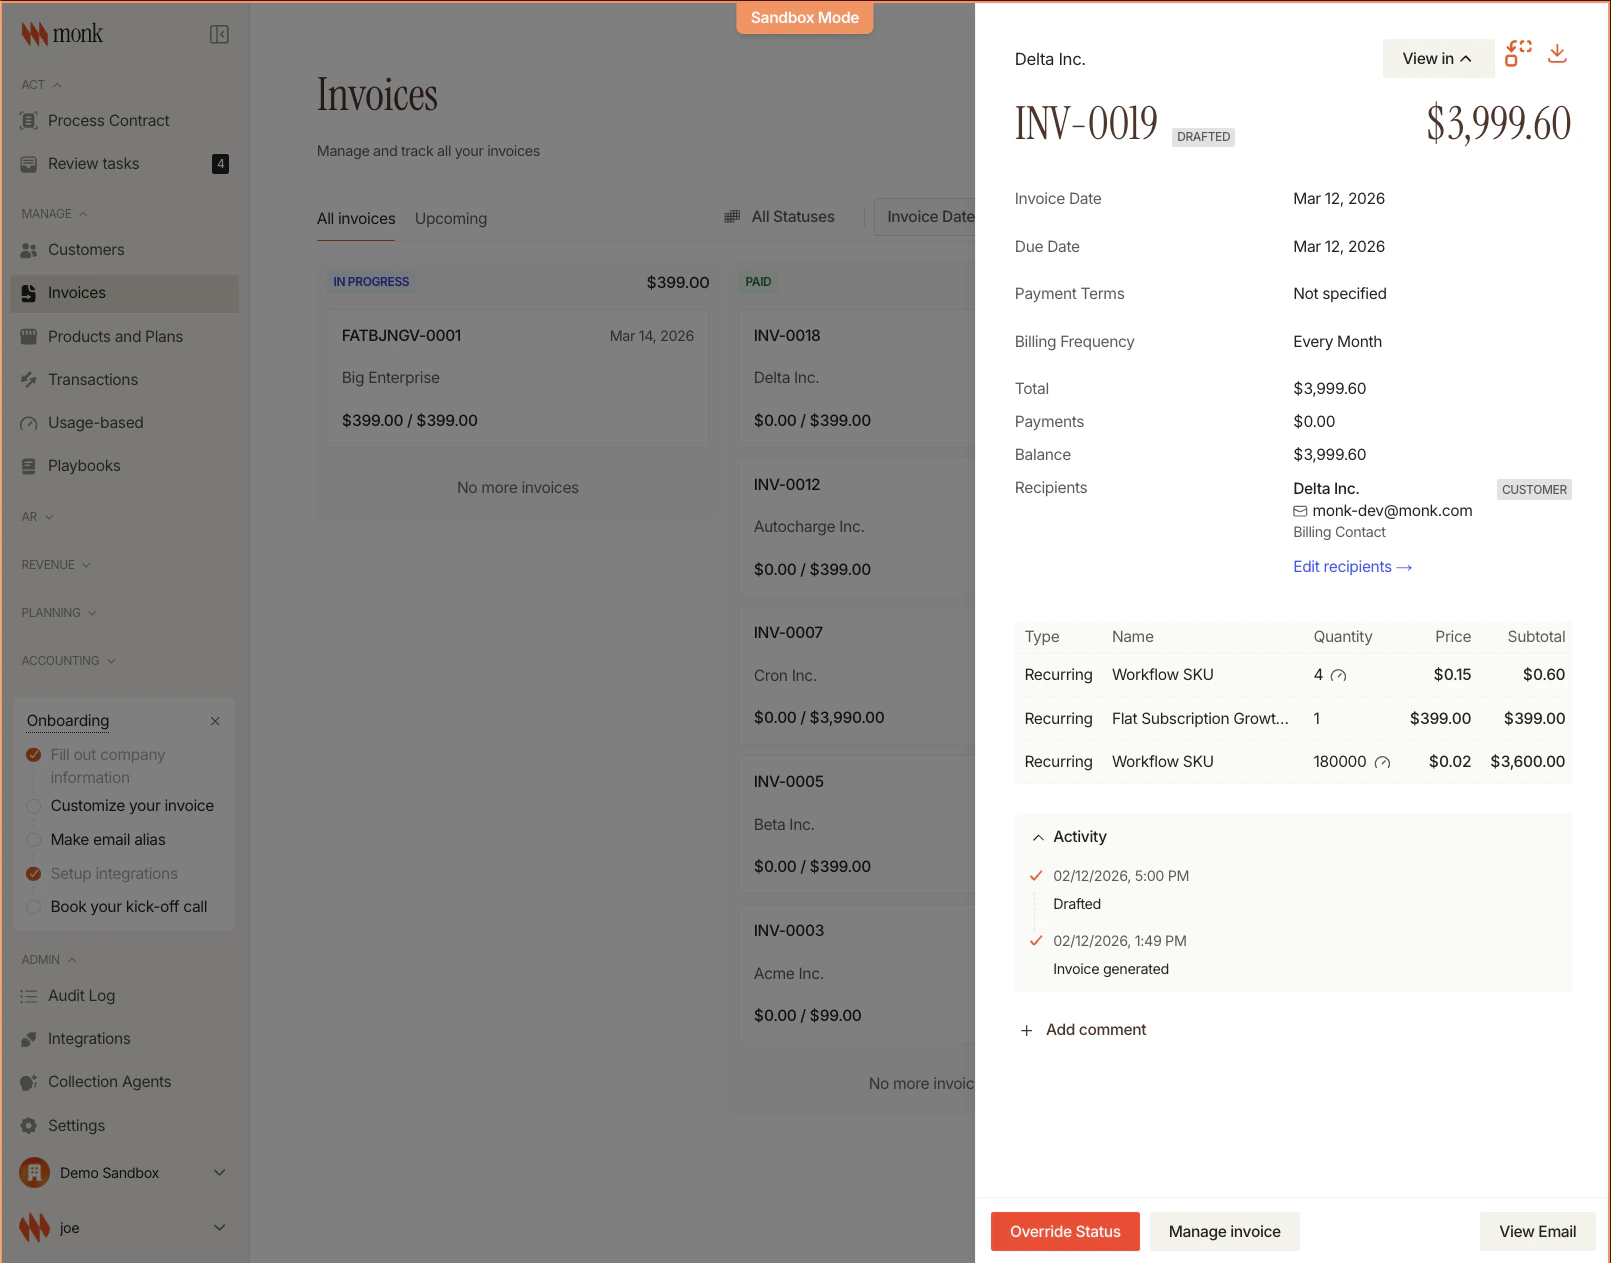
Step 7: Invoice Lifecycle
Understanding how invoices flow through the system:Invoice Statuses
| Status | Description |
|---|---|
| Drafted | Invoice created, not yet sent |
| In Progress | Usage being recorded |
| Sent | Invoice sent to customer |
| Paid | Payment received |
Auto-Pay Flow
For contracts with auto-pay enabled:- Invoice reaches its
invoiceDate - Monk’s daily scheduler finds due invoices with auto-pay
- Stripe PaymentIntent is created and confirmed
- Invoice is marked as Paid when payment succeeds
- Customer receives payment confirmation email
Next Steps
Billing for AI Products
Dimensional pricing for AI/ML (different rates by region, model, etc.)
Create your first Meter
Detailed tutorial on meters
Create your first Plan
Detailed tutorial on plans
Create your first Contract
Detailed tutorial on contracts
Set up Auto-Pay
Detailed tutorial on auto-pay